Posts

Showing posts from April, 2012

A Better Archive Page for Blogger

Image
This is for me, the better Archive Page. Let's see the how it looks. or you can just click my ARCHIVE PAGE in the navigation bar on top. This has cool feature also: Sort by title (ascending or descending) - by clicking the "POST TITLE" table header. Sort by date (older first or newer first) -  by clicking the "POST DATE" table header. Option to show all post by Label When you hover the post title a snippet of the post will display. Things that it doesn't have, which is acceptable: You can't change the date format You can't change table header unless you edit the script. Here's how to implement it. 1. Create a Page           For New Blogger Interface: Dashboard > Pages > New Page > Blank Page           Put a title, of course, like "Archive". :D 2. HTML Tab > Paste the code below <div id="bp_toc"> Loading TOC. Please wait....</div> <script src="http:/...

Creating a Pop-up Contact Form

Image
Before we start this is the DEMO . You will be redirected to my another blog. LOL Just scroll down and click the SUBMIT A FILE!. Too much for the demo. Here's how to do it. 1. Go to this SITE . Sign up, don't complain it a very fast and an easy procedure. 2. After you sign-up, you need to log-in, of course. 3. Start adding form by clicking on the top-right 4. You will be given a 2 option, choose number 1. Add Form 1. Go to the Template section. I'd like to choose from a list of pre-made forms. 2. Take me to the Form Builder. I'd like to create my own form. 5. Start customizing, it's so easy. 6. Save the Form that you have created. After saving, go back to MY FORM.  7. You will be redirected here. Follow the instruction on the image. 8. The whole script is look like this. Just an example, use the code provided by the site.  <script type="text/javascript"> function emf_open_window(url, height, width) { var leftPos = 0; v...

Creating a Simple Button for Demo

This is the result: Live Demo And the code for this is: For CSS Mark-Up, Paste is before  ]]></b:skin> a.demo{   background:skyblue;   padding:5px 20px 5px 20px;   text-align:center;   font-family: Arial;   font-size:18px;   border:#e1e1e1 1px solid;   -webkit-box-shadow: 0 8px 6px -6px black;   -moz-box-shadow: 0 8px 6px -6px black;   box-shadow: 0 8px 6px -6px black;   color:#e1e1e1; } a:link.demo,a:visited.demo{   text-decoration:none;   } a:active.demo {text-decoration: none;color:gray;padding:4px 20px 4px 20px;} a:hover.demo {text-decoration: none;box-shadow:none; } and this is how we use it. For HTML Mark-Up  <a class="demo" href=" LINK OF THE PAGE HERE " title="see it live">Live Demo</a> Every time we use this button just define the link by putting " class="demo" " just like the above example. You can customize the background, font and color ...

How to Add an Embedded Forum in Blogger

Image
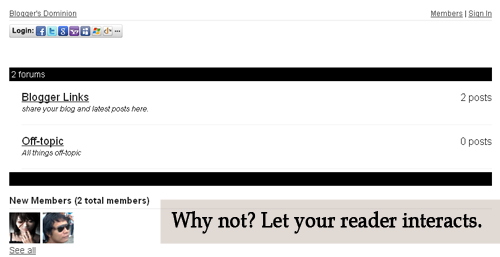
Let's see how it look like first. Is it good? Now, see it live. Click here . Then click the Forum Tab , wait 'til it loads. How to do it? Actually, it's very easy. 1. Just go to this site and sign-up. 2. Then go to your Blogger Dashboard > Edit Posts or New Posts > Edit Pages > Create New Page. 3. Name your page as Forum or anything you want. 4. Click Edit HTML  5. Paste the script that is given by tal.ki. The script looks like this. <script src='http://j9tjfgzo57.embed.tal.ki/embed/1.js' type='text/javascript'/><div id='j9tjfgzo57t4lk1prm0' style='font-size:80%; text-align:center;'>get your own <a href='http://tal.ki?utm_source=install&amp;utm_medium=link&amp;utm_campaign=get_your_own'>embeddable forum</a> with Talki</div> 6. Preview, if it's fine. Publish it! That's it!

The First Book That I Have Ever Read

Image
I'm not that type of guy who read books, I'm too lazy to do it. I don't even study my lessons seriously. But last Sunday, due to brownout and I have nothing to do. I saw Mitch Albom's book on the corner, "The Five People You Meet In Heaven" and I try reading it. I finished it within the day, it's great. It gives you the idea of what is HEAVEN. And I never thought that it has a movie based on this book. You can watch it in YouTube, I am watching it right now. Here's the link. Now, I am planning to buy a book to read this summer.  What's your first book?

Two Versus One

Image
Watching American Idol and The Voice is somehow fun. And it's so happen that same song was sang on this two show which is "Somebody That I Used to Know" Somebody That I Used to Know is a song by Belgian-Australian singer and songwriter Gotye from his third studio album Making Mirrors, and features New Zealand singer Kimbra. The song was written by Gotye himself, lyrically about the experiences he has had with relationships. The song was released on 6 July 2011 as the second and lead single off the album. Elise & Phillip: Somebody That I Used to Know - AMERICAN IDOL SEASON 11 Lindsey Pavao: "Somebody I Used to Know"-The Voice So, which is better? or shall I say who?  Oppps! the original:

Disabling Facebook Timeline

Image
Hate Facebook Timeline? Here are the steps which is so simple. Hahaha If you don’t like the new Timeline feature on Facebook and want to view profiles in the old style, then TimelineRemove is the perfect extension for you. This tiny, but handy tool disables the new Facebook timeline feature and restores the classic look, without changing the timeline behavior for other visitors of your Facebook profile. The extension basically works by hiding the timeline, so you can view your own and others’ profiles in the old style. TimelineRemove works automatically once installed, and a button is added to the toolbar that lets you toggle the timeline on and off, whenever you want. 1. Go to this site. 2. Just install the extension as stated on the website page. The problem with this is,  you need to install the extension on every browser you have e.g. Firefox, Chrome. Actually,   your Facebook Profile is still on Timeline if you view it  on the browser that doesn't have th...

Setting Up 404 Page Not Found in Blogger

Image
Blogger has featured "404" page customization. Just a fact: The 404 or Not Found error message is a HTTP standard response code indicating that the client was able to communicate with the server, but the server could not find what was requested. The web site hosting server will typically generate "404 - Not Found" web page, when users attempts to follow a broken or dead link, hence the 404 error is one of the most recognizable errors users can find on the web To start this,  you need to upgrade your Blogger  to a new look . Then, follow the instruction below:   Inside the black border is where you can add your custom 404-Not Found Page  You can use this conditional tag to hide the widgets for your 404 page. <b:if cond='data:blog.pageType == "error_page"'> <style type="text/css"> PUT YOUR CSS CODE HERE </style> </b:if>  or this code <b:if cond='data:blog.url != &quot;YOUR BLOG URL...

My New Template

Image
So this past days, I've been busy creating and customizing template instead of making my Final Project in Data Structure. I'ts really hard to design if you are not a designer. LOL old template My o ld template has the ff: Auto Read more script Twitter Feed Disqus Comment Related Stories Recent Comment Script I also integrated my Anime Songs Compilation . new template On the other hand, my new template has the ff: Twitter Feed Social Network Button every post I remove the ff: Disqus comment: I use the blogger comment, not the threaded one. Auto Read more script: I will manually use the jump break in each posts (*sob) I also put the Adsense on the footer. That's it!  Further changes soon! :P